
Section 1: Adding Basic Sensor Groups
Section 2: Create and edit sensors (Advanced)
Section 1
Note: in order for these sensors to correctly working and display accurately, please make sure the device is installed to the minimum specifications listed in our install guides.
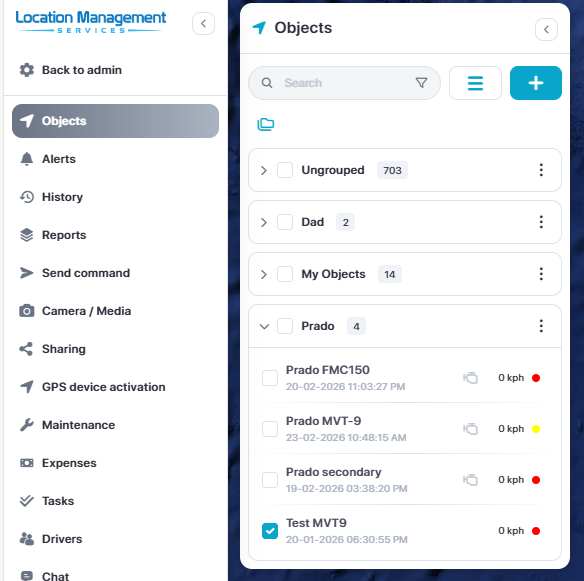
To add basic sensors and setup and ignition icon, select the Edit option for the device your with to update from the object list.
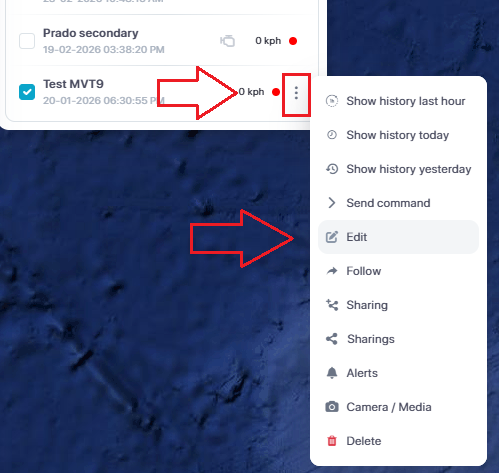
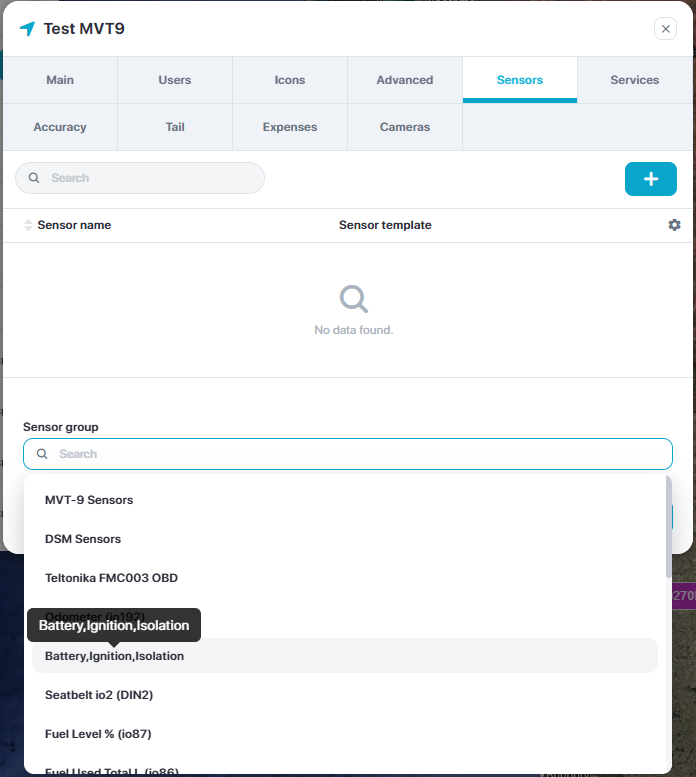
Select the Sensor tab and then from the bottom dropdown menu, select the basic sensor group Battery, Ignition, Isolation and then click Save
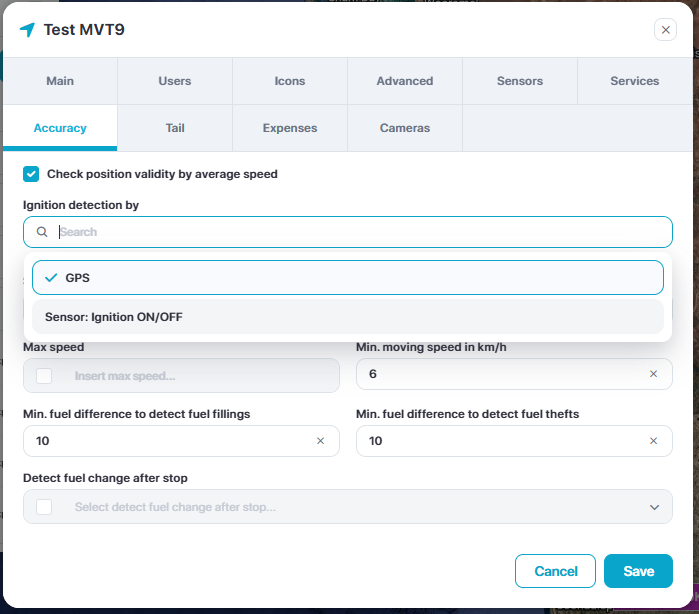
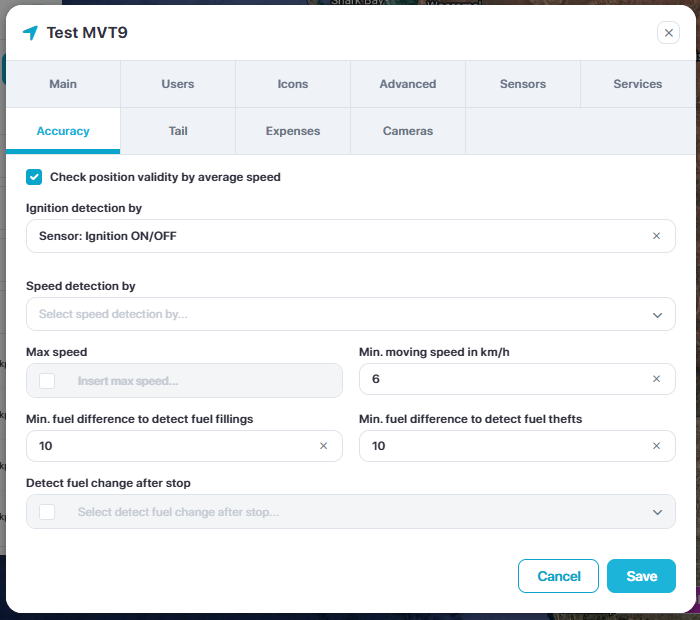
To add the ignition on icon in the device label, re-open the Edit menu, select the Accuracy tab and then from the first dropdown option, select the Sensor: Ignition ON/OFF.
Then click Save
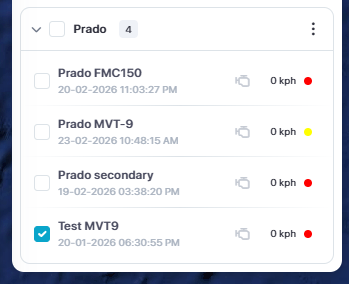
You will now notice the ignition engine symbol next to the device. This will switch from grey to green when the ignition is on.
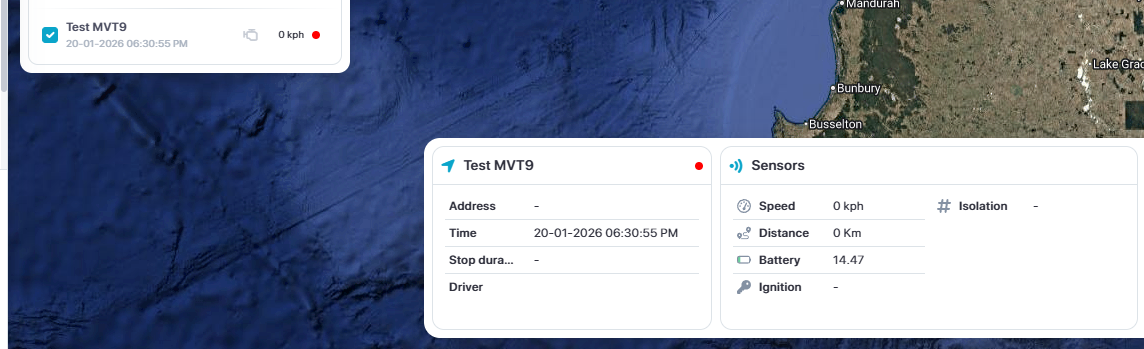
You will also notice the basic sensors listed in the lower information bar
Overview
Sensors allow GPSWOX to convert raw data sent by the tracking device into meaningful information such as:
Engine Hours
Fuel Level
Engine RPM
Battery Voltage
Ignition
Coolant Temperature
Digital Inputs
CAN Bus values
Analog values
Creating a sensor requires three pieces of information:
The IO Parameter ID being sent by the device.
The format of the data being sent.
The correct sensor configuration inside the GPS platform.
Section 2: Advanced
Step 1 — Open the Device Sensors
Use this page to create, edit or delete sensors.
Navigation
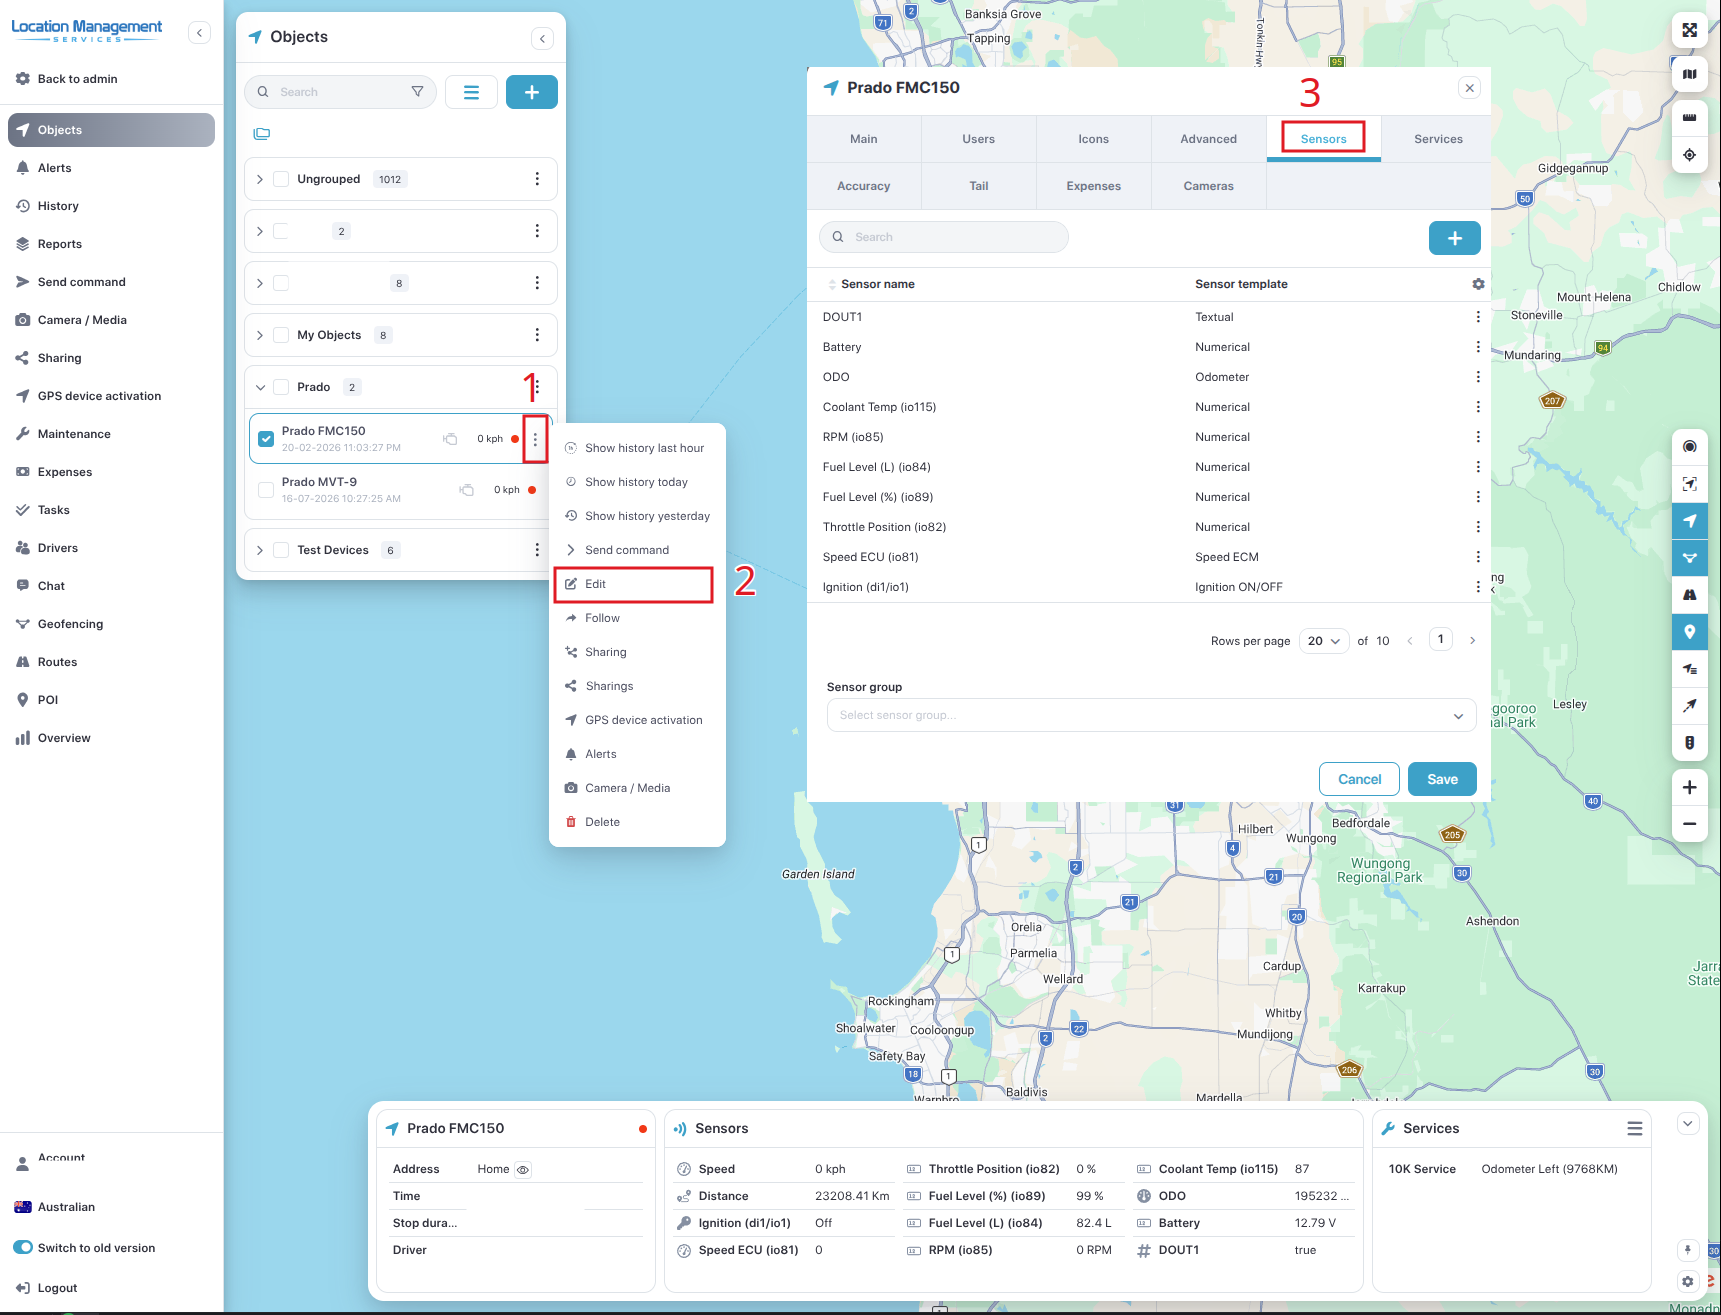
Open Objects.
Select the required device.
Click the ⋮ (three dots).
Select Edit.
Open the Sensors tab.
From this page you can:
Add a new sensor using the + button.
Edit an existing sensor using the ⋮ menu.
Delete sensors that are no longer required.
Assign the device to a Sensor Group.
Recommendation: If a sensor already exists, edit it rather than creating a duplicate.
Step 2 — Find the Raw IO Data
Before creating a sensor you need to confirm the tracker is actually sending the required data.
Navigation
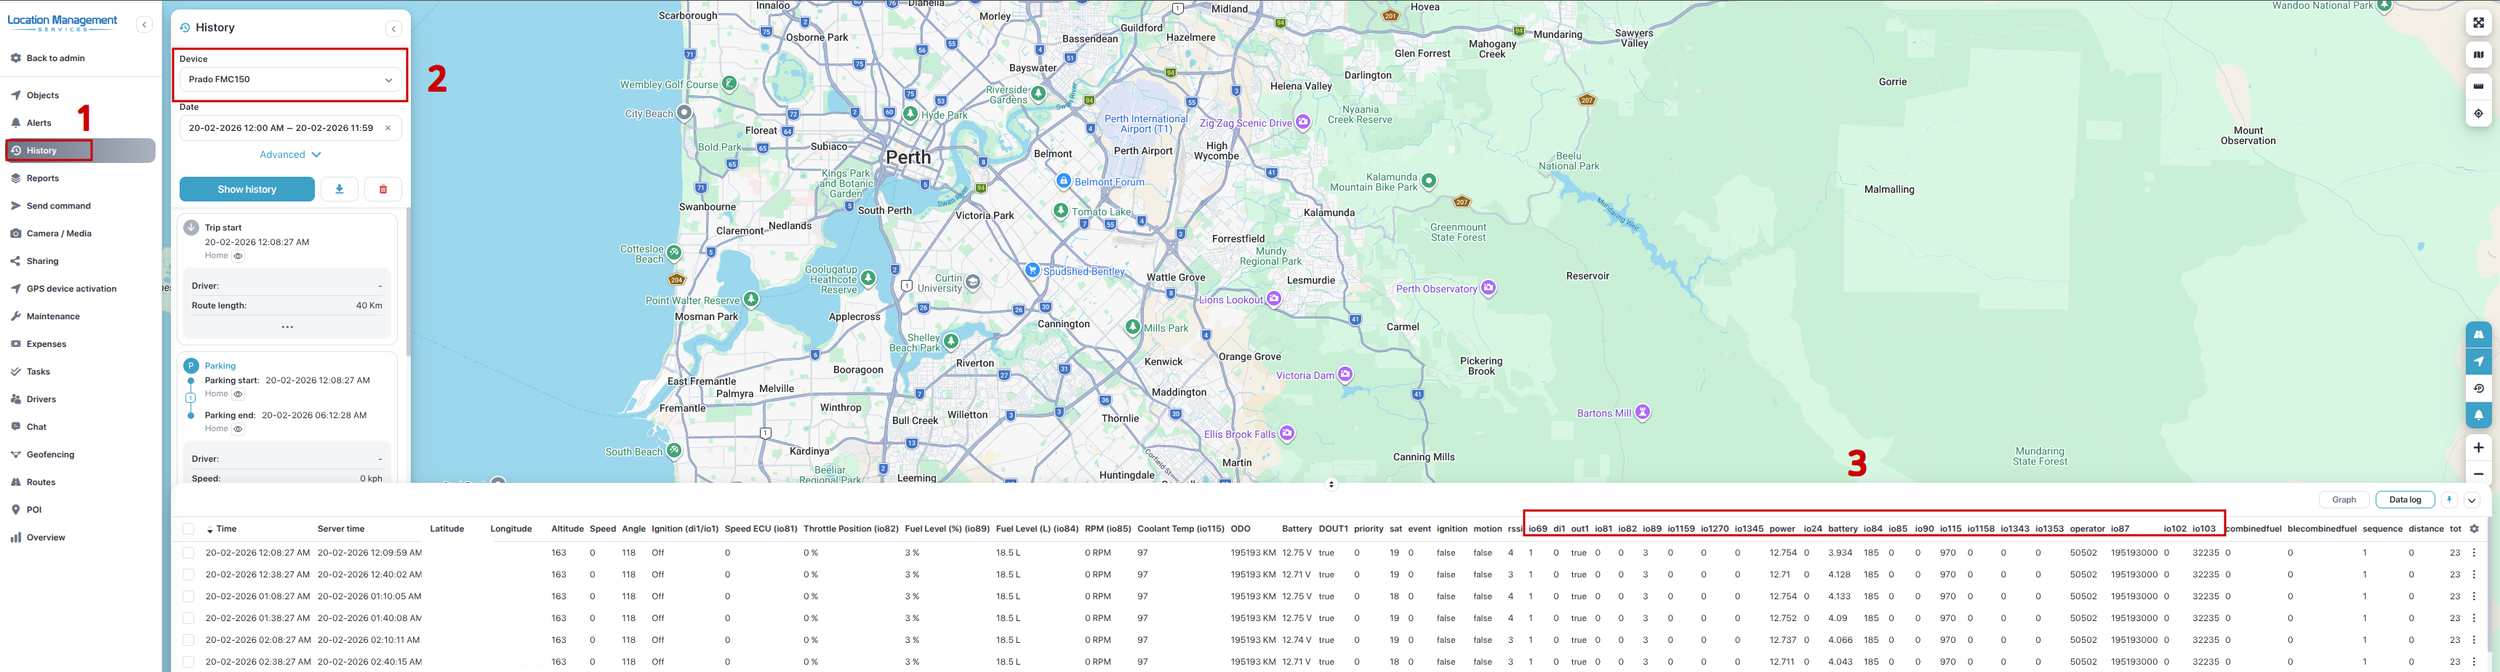
Open History.
Select the required device.
Select a time where the device was operating.
Click Show History.
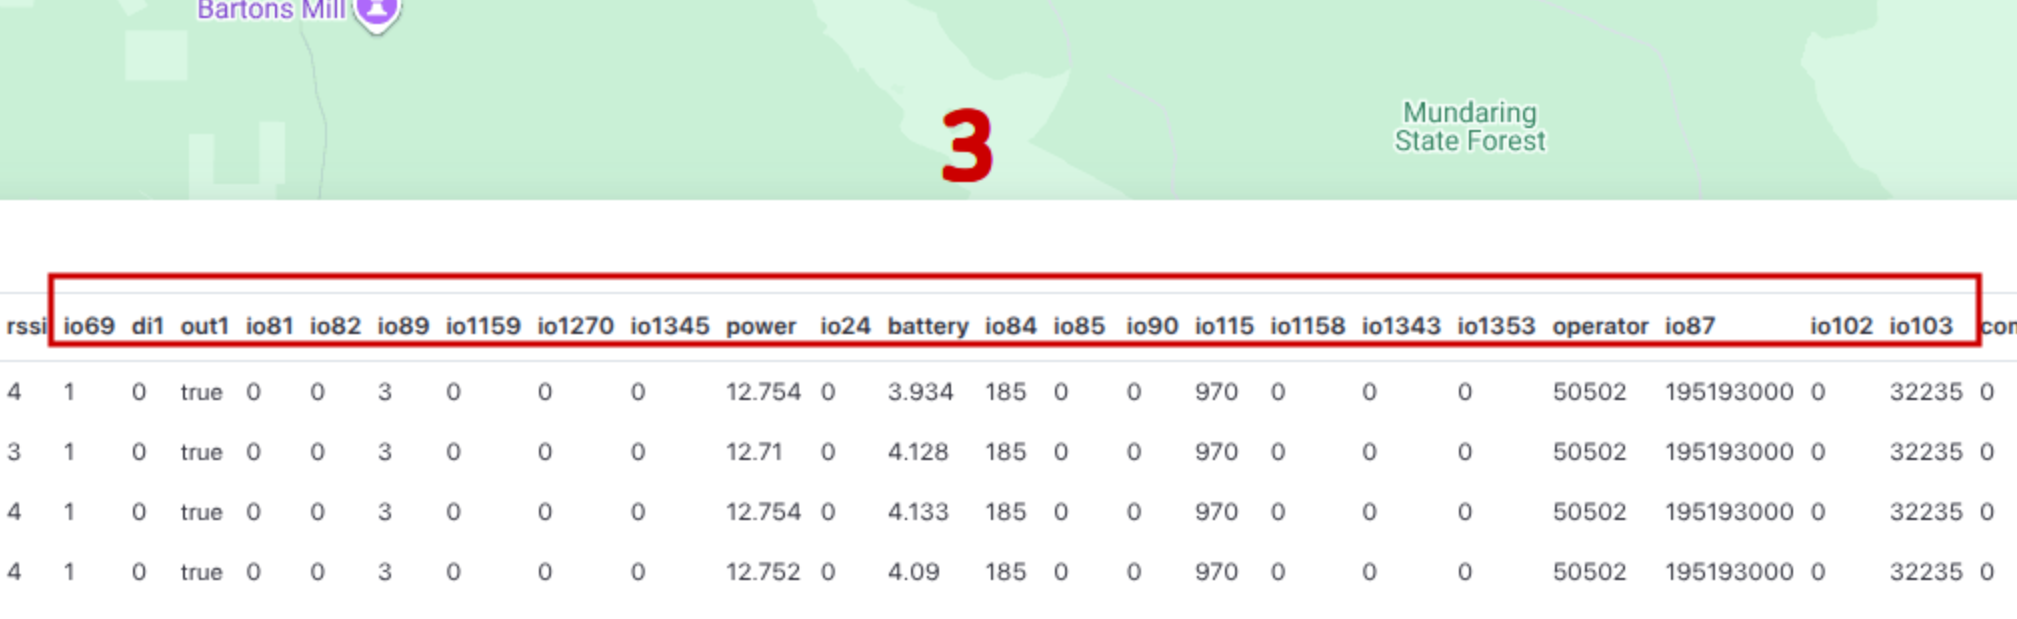
Scroll down to the Data Log.
The Data Log displays every raw value received from the device, including:
io1
io24
io66
io67
io239
io385
etc.
If the required IO value does not appear in the Data Log, the device is not currently transmitting that parameter.
Creating a sensor for data that is not being sent will not display any values.
Step 3 — Find the IO Parameter Definition
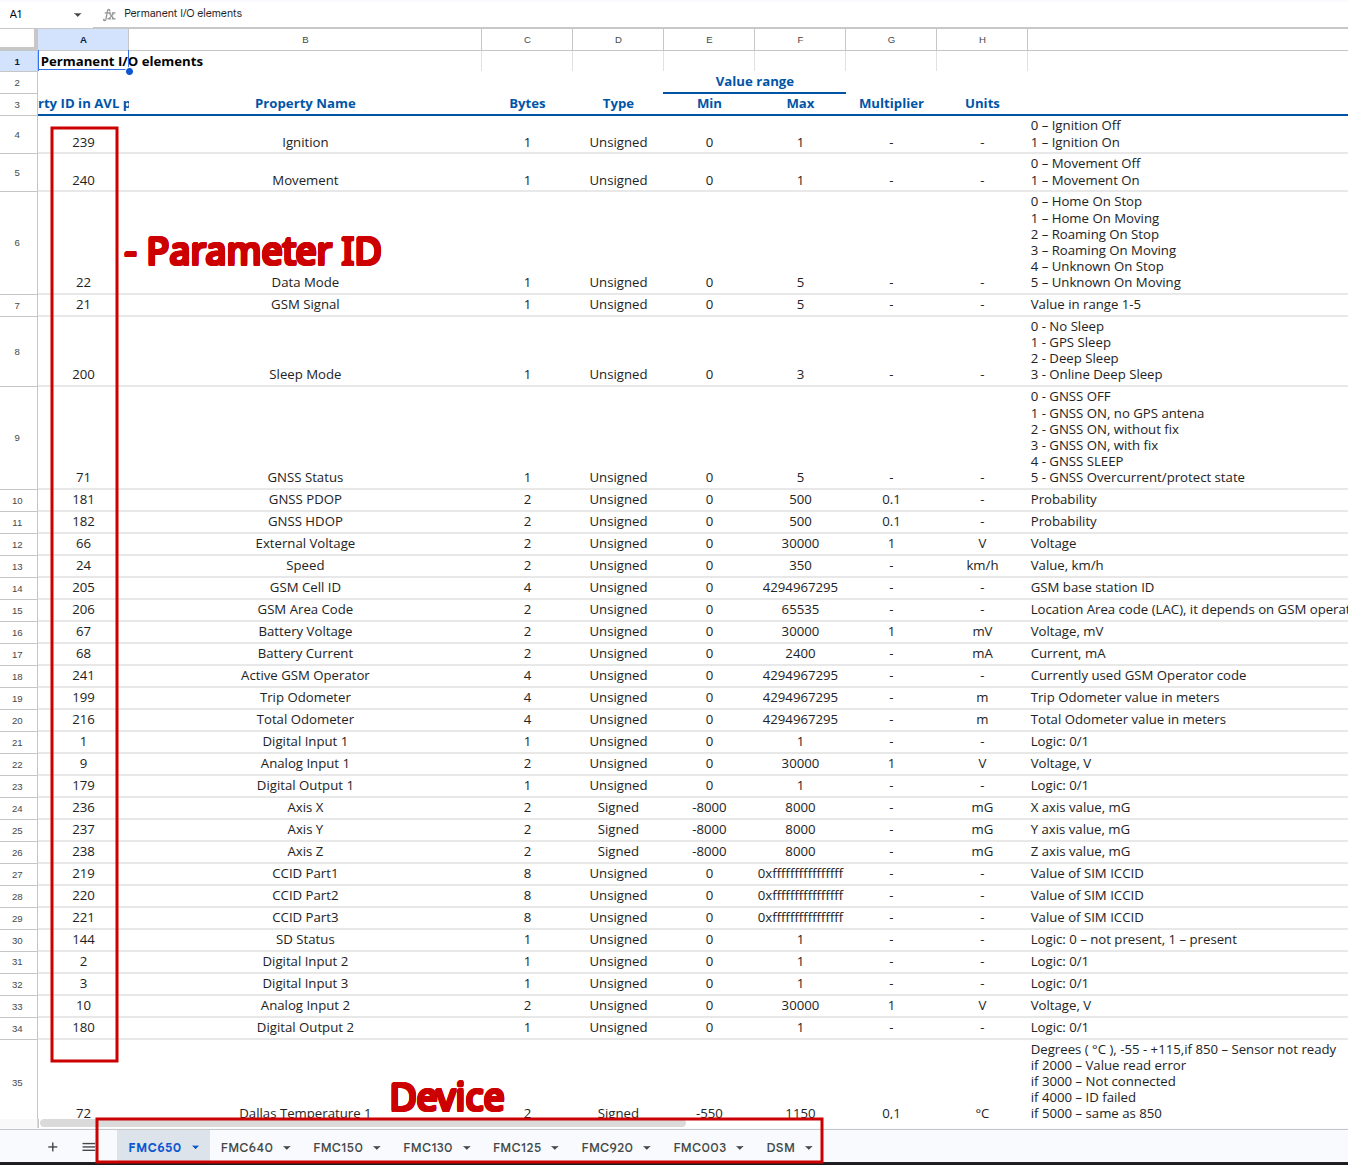
Once you've identified the IO Parameter number, open the Teltonika IO Parameter spreadsheet
Download Sensor Spreadsheet: Download
Search for the IO ID shown in the Data Log.
The spreadsheet provides:
Parameter Name
IO ID
Data Type
Units
Minimum / Maximum values
Supported devices
Description
The spreadsheet tells you exactly what each IO value represents and how the tracker transmits it.
Creating a Sensor
Once you know the IO Parameter:
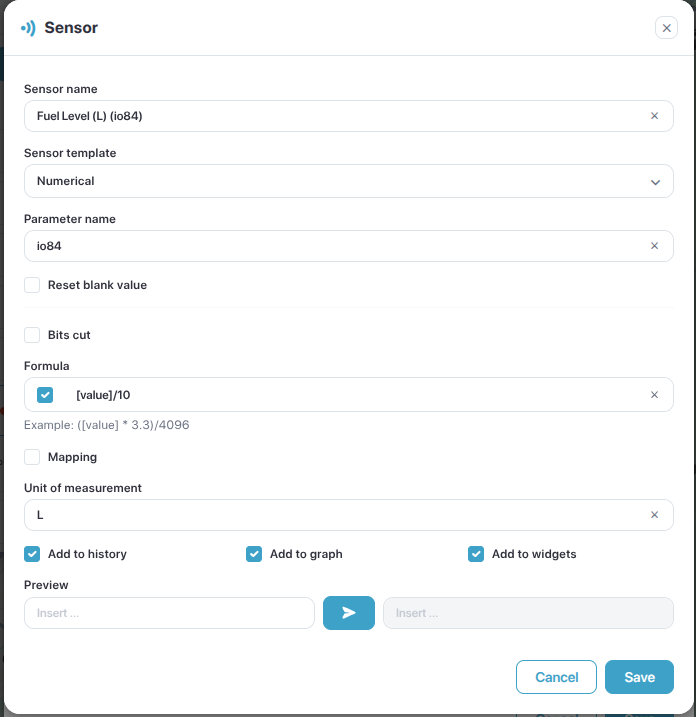
Click +.
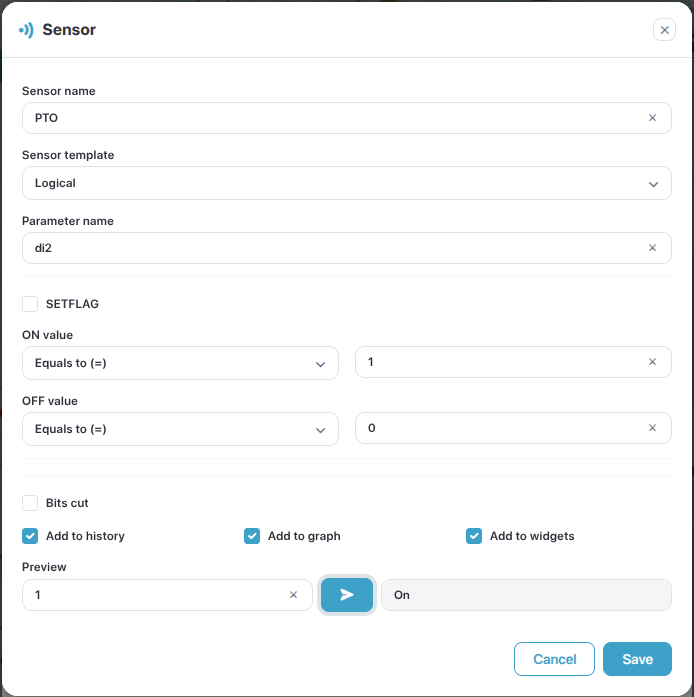
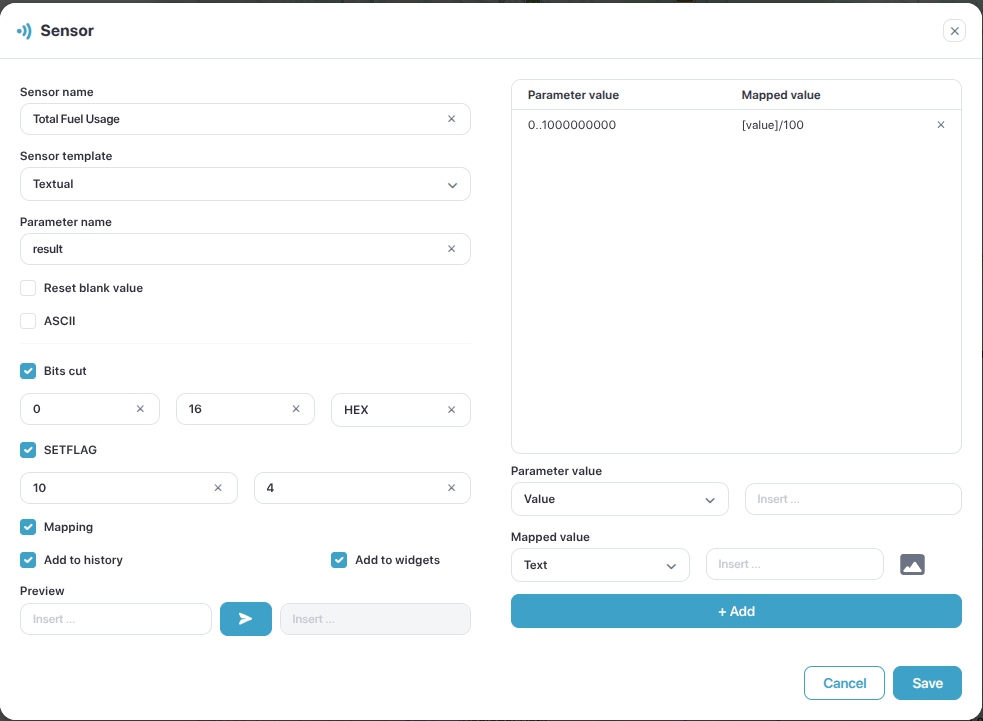
Select the appropriate Sensor Template.
Enter a Sensor Name.
Configure the IO Parameter ID.
Apply any required scaling or formulas.
Save the sensor.
The GPS platform will immediately begin using that sensor for future incoming data.
Tips
Always verify the device is transmitting the IO Parameter before creating a sensor.
Many parameters only appear while the engine is running or when a specific feature is active.
CAN Bus parameters will only be available if the CAN adapter supports that vehicle.
If the tracker firmware or configuration changes, available IO Parameters may also change.